使用 rofi 搭建好看的电源管理界面 rofi 是一款轻量级的窗口切换器、运行对话框、ssh 启动器以及 dmenu 的替代品。由于其可以用脚本方式调用,且官方提供了高度自由的样式定制方法,许多厉害的大佬会用它来做各种各样炫酷好玩的东西。在本篇博客中,我尝试用它做一个电源管理界面(powermenu),并用 dunst 丰富其视觉效果。
一切神话,始于安装。arch 的包管理器可以直接获取最新版本的 rofi 编译后文件。
电源管理脚本 一些原理的讲解 在正式开始前,我们先简单理解一下我们的需求。创建一个电源管理界面,实际上就是唤出一个菜单。该菜单提供了关机、重启、锁屏、挂起、睡眠、登出等选项。选定选项后,再发一个 Are you sure ? 的确定菜单。 如果是在 Windows 环境下,你可能需要用到 Windows API 什么的。但是在 xServer 下的 linux 系统当中,只需搭配一个 rofi 就可以很轻松地呼唤出一个高可定制的菜单。呼唤菜单的常用方式如下:
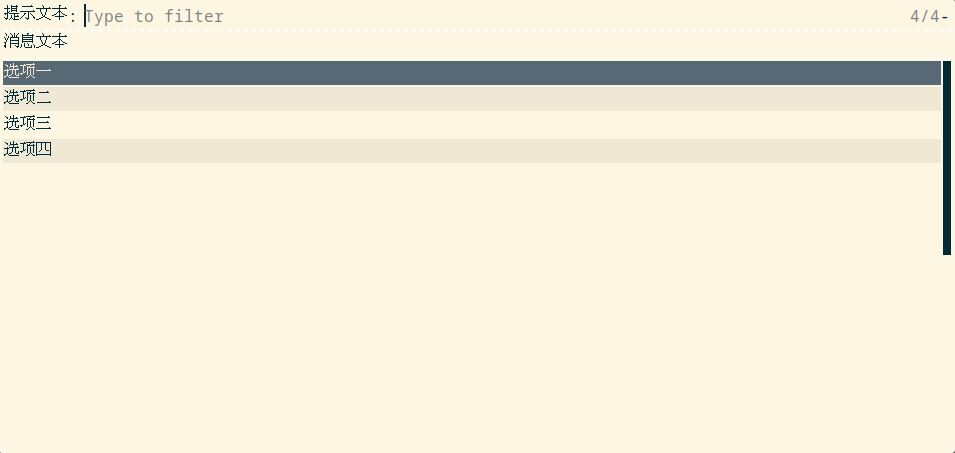
1 echo "选项一\n选项二\n选项三\n选项四" | rofi -dmenu -p "提示文本" -mesg "消息文本"
如上图所示,该指令唤出了一个十分朴素的菜单。该菜单提供了我们指定的提示文本、消息文本、和选项列表。当我们选中选项后,rofi 指令会将选项文本返回作为指令的返回值。 该值可以在 shell script 脚本中被获取并调用,这就为我们自定义电源管理界面的启动脚本提供了基础。
基础变量的赋值 这里,定义了电源界面采用的主题、要显示的信息(主机名称和登陆时长)以及可选的选项列表。各个选项使用 utf-16 编码表示,实际上对应指定的 iconfont。
1 2 3 4 5 6 7 8 9 10 11 12 13 14 15 16 17 18 19 20 21 dir ="$HOME /.config/rofi/powermenu/" "default" "$(hostname) " uptime ="$(uptime -p | sed -e 's/up //g') " "$(echo -e '\uf023') " "$(echo -e '\uf021') " "$(echo -e '\uf011') " "$(echo -e '\uf186') " suspend ="$(echo -e '\uf0f4') " logout ="$(echo -e '\uf08b') " yes ="$(echo -e '\uf058') " "$(echo -e '\uf057') " "$(echo -e '\uf007') " "$(echo -e '\uf017') "
这样,在字体支持的情况下,电源界面的各个选项就会以图标方式显示。想知道编码对应的图标,可以使用类似于 echo -e "\uf057" 的指令查看。注意:由于 shell scripts 不支持直接对 utf-16 编码按字符级别处理,因此这里将其先通过 echo -e 变为字符级别的表示。
呼唤菜单的部分 电源管理菜单 定义了两个函数。run 函数提供了选项列表。cmd 函数指定了 rofi 的提示信息和主题文件。
1
2
3
4
5
6
7
8
9
10
run_powermenu echo -e "$lock \n$reboot \n$shutdown \n$hibernate \n$suspend \n$logout " | powermenu_cmdpowermenu_cmd "$user $USER @$host " \"$clock 已运行: $uptime " \${dir} /${theme} .rasi
确认菜单 与“电源管理菜单”部分相同:定义了两个函数。run 函数提供了选项列表。cmd 函数指定了 rofi 的提示信息和主题文件。不同之处在于,这里通过 -theme-str 指定了少许样式。
1
2
3
4
5
6
7
8
9
10
11
12
13
14
15
run_confirm echo -e "$yes \n$no " | confirm_cmdconfirm_cmd "window {location: center; anchor: center; fullscreen: false; width: 350px;}" \"mainbox {orientation: vertical; children: [ " message", " listview" ];}" \"listview {columns: 2; lines: 1;}" \"element-text {horizontal-align: 0.5;}" \"textbox {horizontal-align: 0.5;}" \"确认界面" \"你确定吗?" \${dir} /${theme} .rasi
由于确认菜单在不同主题间高度可共享,将其部分样式指定放在脚本当中以让不同风格的电源管理界面可以共用一套确认菜单。这里的主题主要指定了确认菜单应该以如图所示的方式呈现:
该菜单的配色是由给定的主题文件(也就是 ${dir}/{theme}.rasi)指定的。这样一来,它将会与电源管理菜单的配色风格保持一致。因此,多重主题的电源管理界面将会共享相似但配色方案不同的确认菜单。
执行操作的部分 1 2 3 4 5 6 7 8 9 10 11 12 13 14 15 16 17 18 19 20 21 22 23 24 25 26 27 28 29 30 31 32 33 34 35 36 37 38 39 40 41 42 43 44 45 46 47 48 49 50 51 shutdown_action "$(run_confirm) " if [[ $isconfirm == $confirm ]]; then fi reboot_action "$(run_confirm) " if [[ $isconfirm == $confirm ]]; then fi hibernate_action "$(run_confirm) " if [[ $isconfirm == $confirm ]]; then fi suspend_action "$(run_confirm) " if [[ $isconfirm == $confirm ]]; then set Master mutesuspend fi logout_action "$(run_confirm) " if [[ $isconfirm == $confirm ]]; then "$(pidof -s dwm) " if [[ -n $dwm_pid ]]; then kill -TERM $dwm_pid fi fi lock_action if [[ -x '/usr/bin/i3lock' ]]; then fi
关机操作:是否确认?如是,则运行 systemctl poweroff .
重启操作:是否确认?如是,则运行 systemctl reboot .
休眠操作:是否确认?如是,则运行 systemctl hibernate .
挂起操作:是否确认?如是,则关闭当前播放音频,设置主音量静默,并运行 systemctl suspend .
登出操作:是否确认?如是,则找到并 kill 当前的窗口管理器(我这里是 dwm) .
锁屏操作:运行 i3lock. 这里的操作可以自定义.
main 函数部分 1 2 3 4 5 6 7 8 9 10 11 12 main "$(run_powermenu) " case $chosen in $shutdown ) shutdown_action ;;$reboot ) reboot_action ;;$hibernate ) hibernate_action ;;$suspend ) suspend_action ;;$logout ) logout_action ;;$lock ) lock_action ;;esac
首先获取 powermenu 返回的文本,然后进入 case 代码块进行文本匹配。匹配到相应的文本就运行相应的函数。主函数的形式十分简单,没什么好讲的。
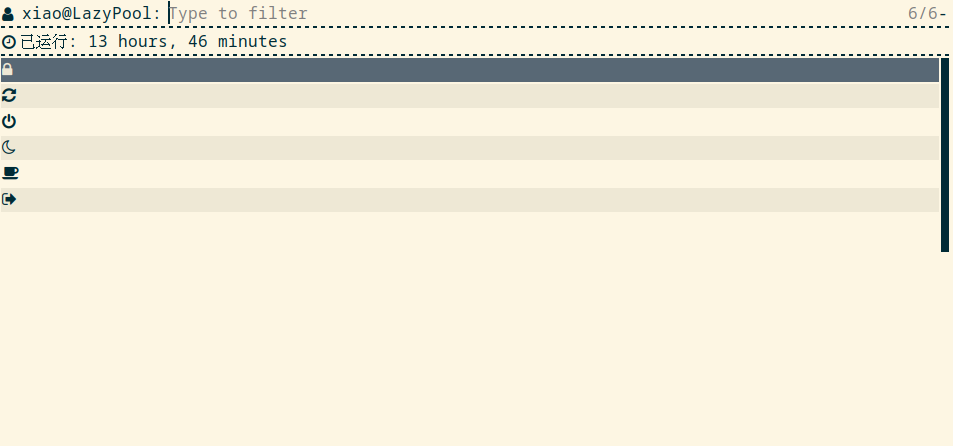
rofi 样式配置 如果不进行任何样式配置,运行该脚本,我们将会唤出一个非常朴素的电源管理界面。它默认使用 gruvbox-light 的主题,各选项以简单的列表方式呈现。
该界面是完全可用的。但这实在是太丑了!为此我们需要配置主题文件。在 .config/rofi/powermenu 文件夹(指定的主题文件夹)下创建 mytheme.rasi 文件并往里面写配置语句。运行 man rofi-theme 指令将能获得关于编写 rofi 主题配置异常完备的指南,对于自定义 rofi 样式相当有帮助。 限于篇幅,这里直接将我的 rofi 配置呈现如下。
1 2 3 4 5 6 7 8 9 10 11 12 13 14 15 16 17 18 19 20 21 22 23 24 25 26 27 28 29 30 31 32 33 34 35 36 37 38 39 40 41 42 43 44 45 46 47 48 49 50 51 52 53 54 55 56 57 58 59 60 61 62 63 64 65 66 67 68 69 70 71 72 73 74 75 76 77 78 79 80 81 82 83 84 85 86 87 88 89 90 91 92 93 94 95 96 97 98 99 100 101 102 103 104 105 106 107 108 109 110 111 112 113 114 115 116 117 118 119 120 121 122 123 124 125 126 127 128 129 130 131 /*************************
这里简单提及下这段配置文件做了什么:它利用 children 字段将组件以 MainBox(ImageBox(Prompt, Message), ListView(Elements)) 的形式组建起来,并用类 css 语言指定各组件的 padding、text-color、background-color、background-img 等,以此丰富界面的视觉效果。
dunst 配置 当电源界面被开启时,运行 call_hint 函数。它会根据按键行为跟踪当前选中的选项(注意:它不跟踪鼠标行为,所以如果用鼠标选中选项它可能会跟踪不准确)。具体来说:
当按键为 Ctrl+u 或 Up 键时,移动到相对于当前选项上方 的选项,并用 notify 函数发起通知。
当按键为 Ctrl+e 或 Down 键时,移动到相对于当前选项下方 的选项,并用 notify 函数发起通知。
当按键为 Ctrl+n 或 Left 键时,移动到相对于当前选项左方 的选项,并用 notify 函数发起通知。
当按键为 Ctrl+i 或 Right 键时,移动到相对于当前选项右方 的选项,并用 notify 函数发起通知。
1 2 3 4 5 6 7 8 9 10 11 12 13 14 15 16 17 18 19 20 21 22 23 24 25 26 27 28 29 30 31 32 33 34 35 36 37 38 39 40 41 42 43 44 45 46 47 48 49 50 notify "$1 " call_hint local idx=0local ctrl=0local rows=$1 "$lock 锁屏" "$reboot 重启" "$shutdown 关机" "$hibernate 休眠" "$suspend 挂起" "$logout 登出" kill -TERM $(pidof -s dunst)$HOME /.config/dunst/powermenu.dunstrc &'RawKeyPress|RawKeyRelease' | while read -r line; do if [[ $line == *"type" * ]]; then echo $line | sed "s/.*(//g" | sed "s/).*//g" )elif [[ $line == *"detail" * ]]; then echo $line | sed "s/[^0-9]*//g" )if [[ "$key " == "37" ]]; then "$event " == "RawKeyPress" ]] && ctrl=1 || ctrl=0elif [[ $ctrl == 0 && "$event " == "RawKeyPress" ]]; then case "$key " in "116" ) idx=$(( (idx + 1 ) % 6 )) ;;"111" ) idx=$(( (idx - 1 + 6 ) % 6 )) ;;"114" ) idx=$((idx + rows)); (( idx > 5 )) && idx=5 ;;"113" ) (( idx >= rows )) && idx=$((idx - rows)) ;;esac elif [[ $ctrl -ne 0 && "$event " == "RawKeyPress" ]]; then case "$key " in "45" ) idx=$(( (idx + 1 ) % 6 )) ;;"31" ) idx=$(( (idx - 1 + 6 ) % 6 )) ;;"46" ) idx=$((idx + rows)); (( idx > 5 )) && idx=5 ;;"44" ) (( idx >= rows )) && idx=$((idx - rows)) ;;esac fi "${messages[$idx]} " fi done kill_hint kill -TERM $(pidof -s xinput)kill -TERM $(pidof -s dunst)
这里还编写了 kill_hint 函数。当调用它时,会结束 call_hint 开启的所有进程,包括 xinput 和 dunst。于此同时,它还将通过 xset r on 恢复键盘自动锁定功能。
最终成果展示
以上,就是配置一个自用的电源管理界面的大致流程,我们使用到了 rofi、dunst 等工具,利用 shell script 作为我们的脚本语言。事实上,我们可以为我们的 OS 制作很多个不同风格与配色的 powermenu,然后通过环境变量来对其进行管理,使 OS 更加酷炫。